Digital darkroom tips: Creating realistic eyes
by Colby Brown
[Feature photo: Tambako the Jaguar]
When it comes to capturing a single photograph of a subject, you are often forced to work within the limitations of the camera gear that you are using. Unlike the human eye, a camera has the ability to capture only a small selection of the dynamic range of light that we all generally see every day. For example, when you look at the image of a Macaque Monkey taken in Cambodia below, it most likely represents a realistic take on what you would have seen if you were standing next me as I captured the shot.
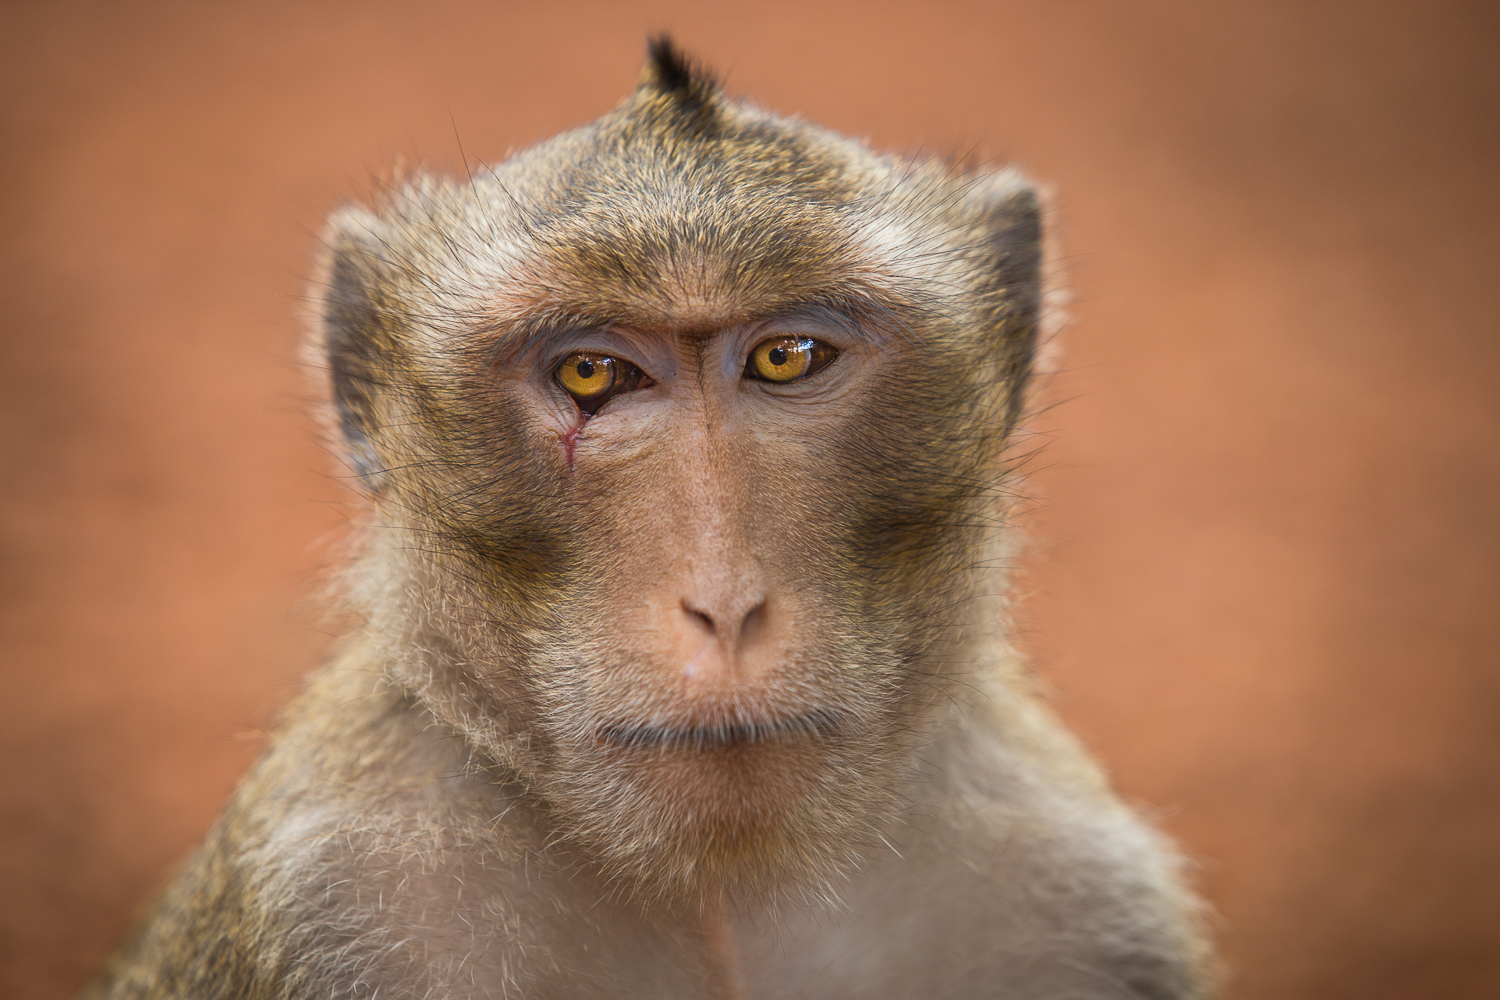
The final processed version of a Macaque Monkey from Cambodia
However, when you look at the original image that I captured with my Canon 1dx, it looks shockingly different. Why? Because the sensor in my camera (similar to nearly all cameras), was only able to capture so much light in the given scene.
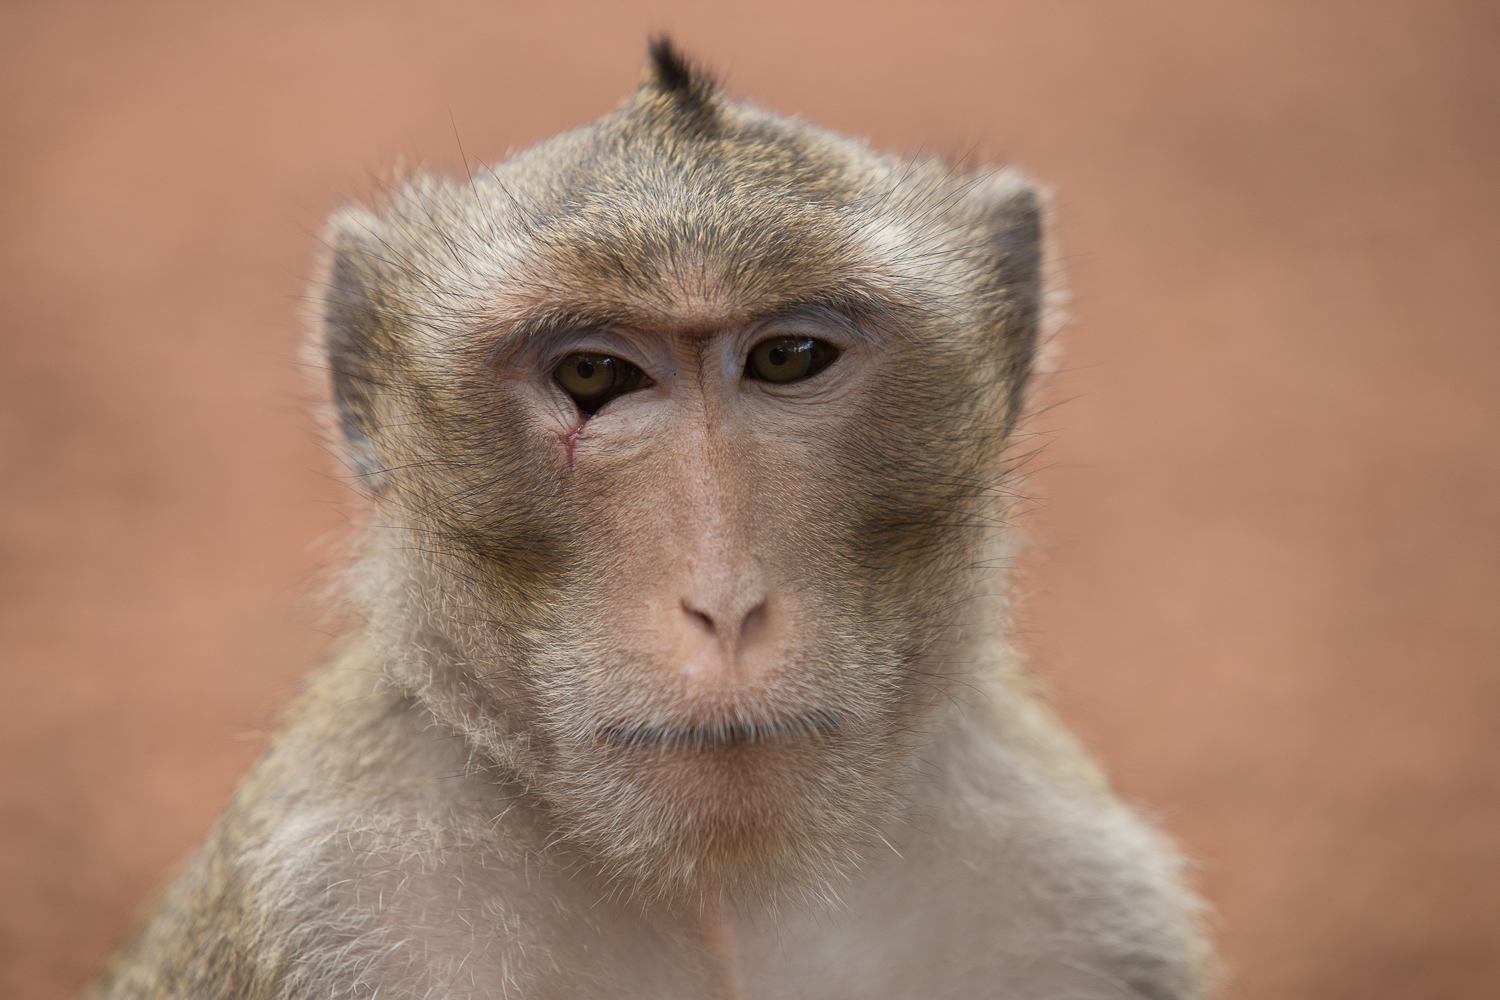
The original image taken straight out of my camera
While I could have captured a more exposed image, it would have blown out the details found in the bright portions of the monkey’s fur coat and altered other aspects of my shot. Instead I knew that I was going to be able to pull out some of those details in post-processing, especially since I captured the image as a RAW file rather than a JPG. While I will save the in-depth explanation between JPG and RAW for another article, the cliff’s note version is that a RAW image file contains much more image data (detail) than a JPG (which has compressed data to make it a smaller file). This means that I will be able to push/edit a RAW image much further then I could if I captured this same image as a JPG. Most digital cameras allow you to choose between the two.
While I know that I have to make adjustments to the contrast, sharpness, and saturation of this image (as seen below), I am going to focus on the monkey’s eyes for this demonstration. For most of my simple editing needs, my weapon of choice is Adobe Lightroom, an incredibly robust organization and editing tool for photographers.
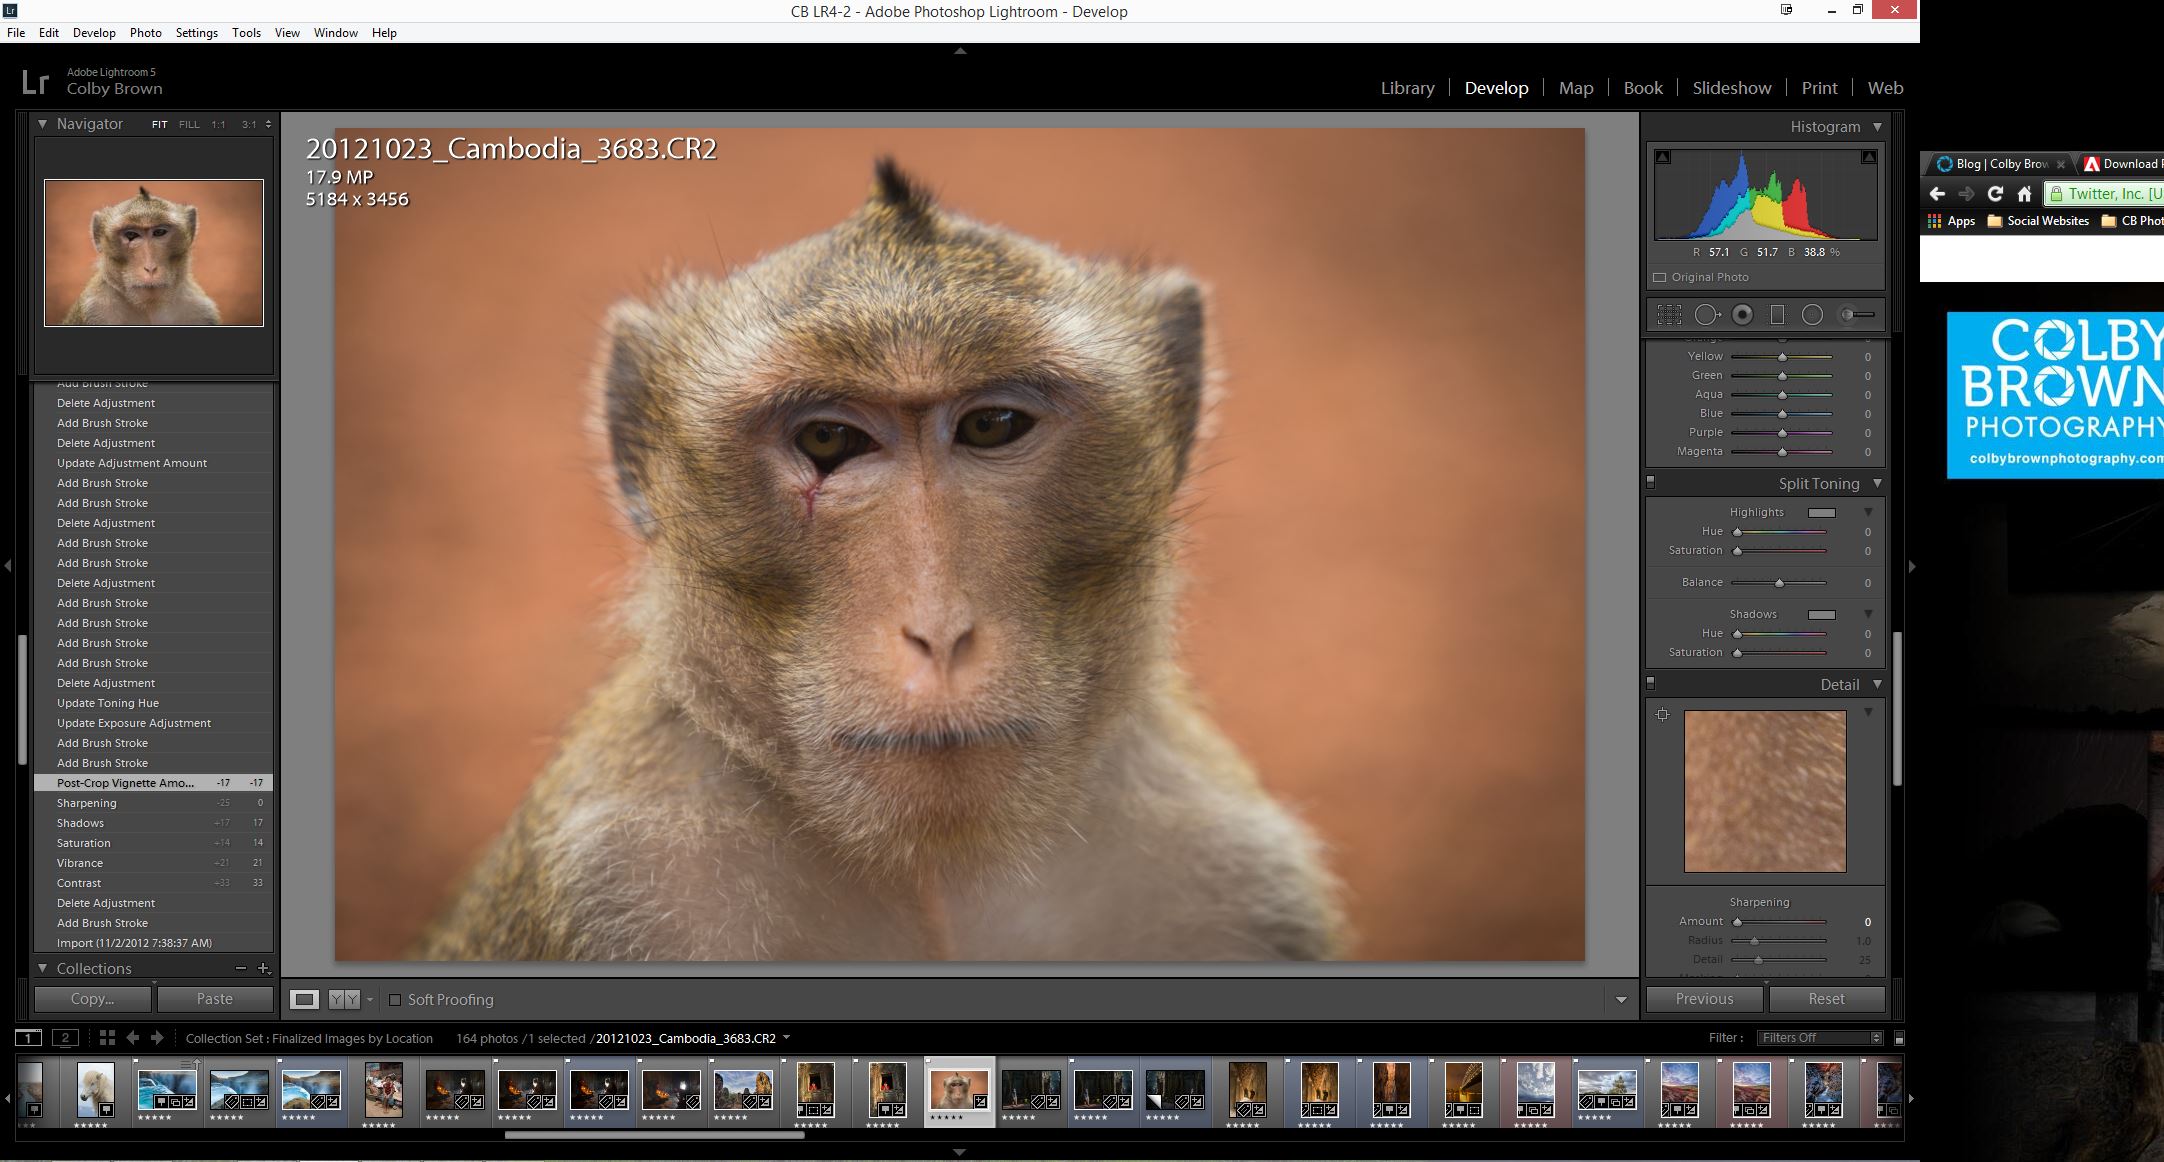
In LR I have applied some simple adjustments to contrast, sharpness and saturation
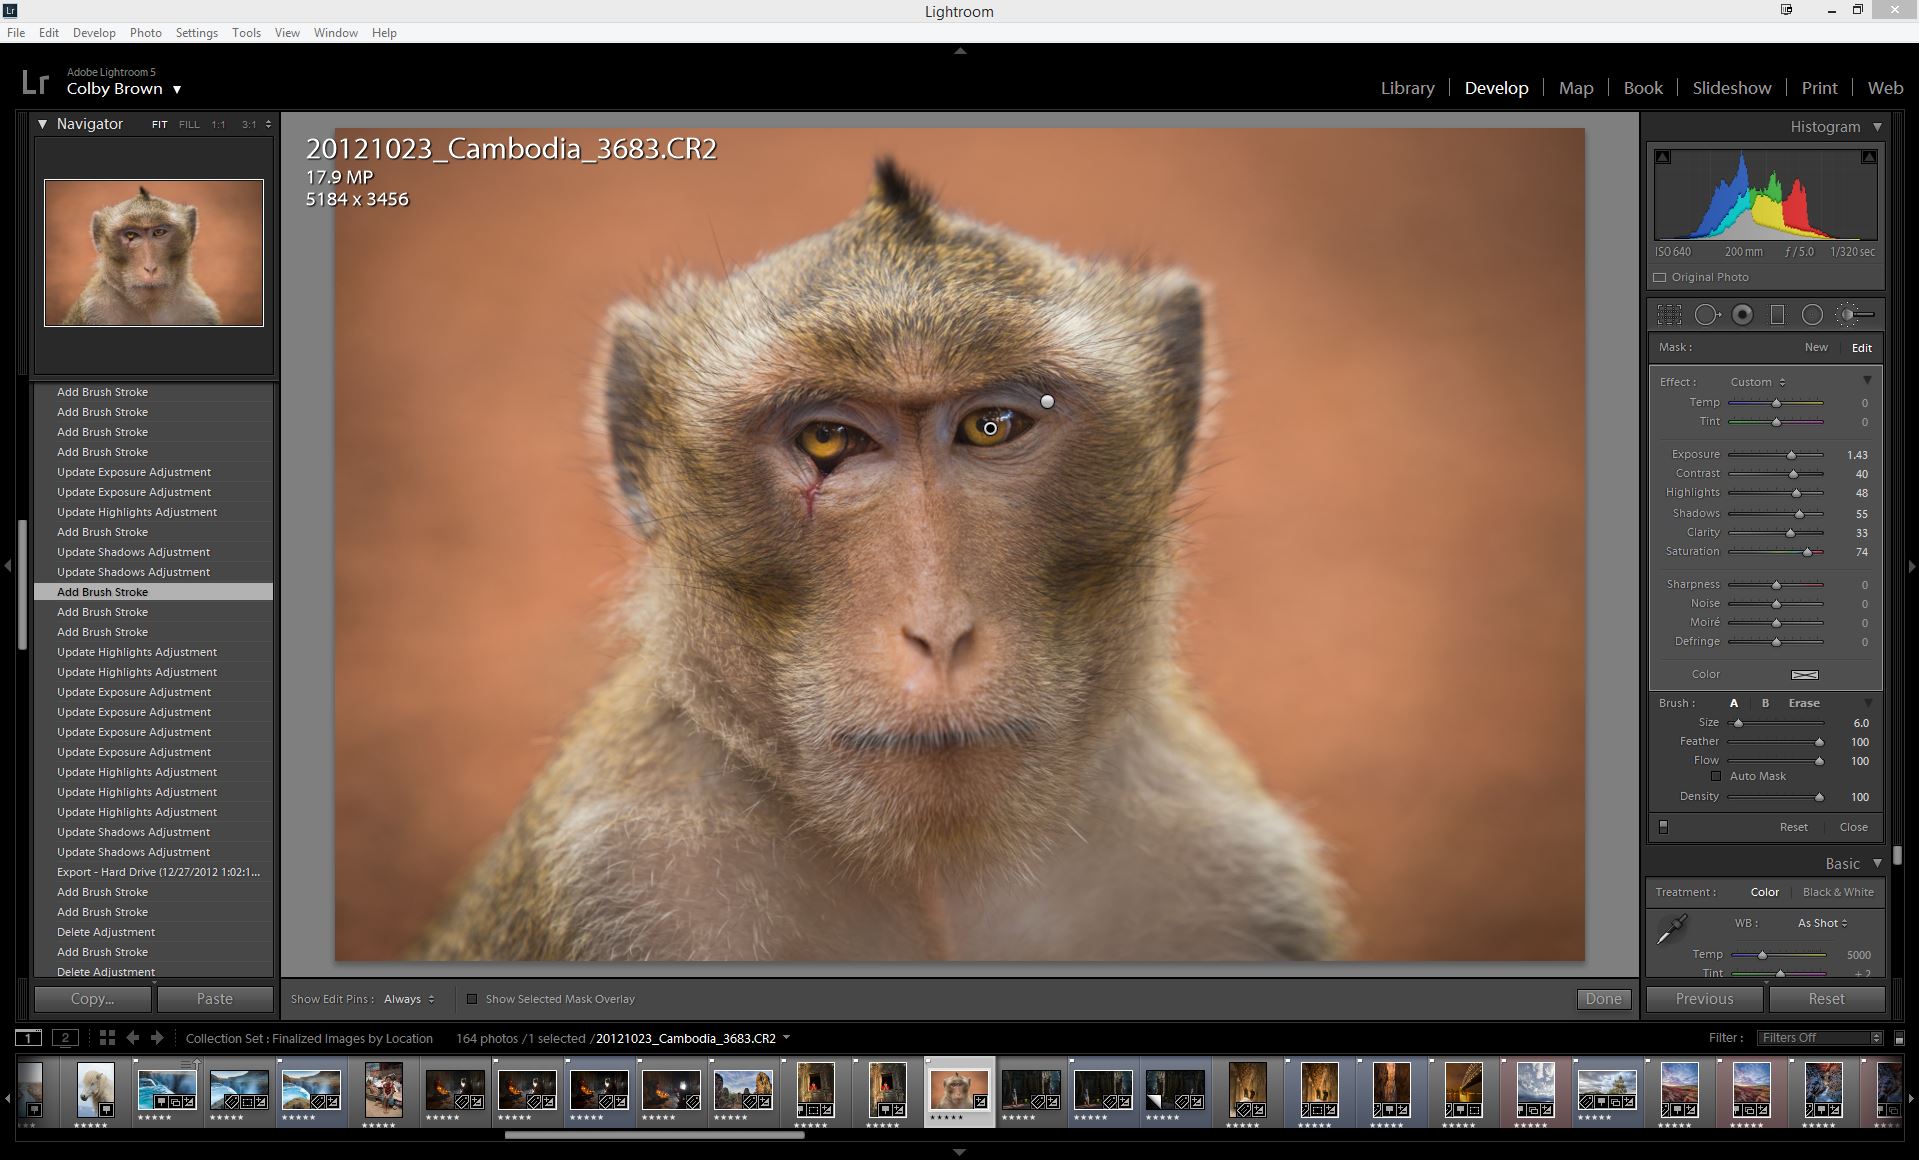
The challenge with editing eyes is that it is very easy to make them look unrealistic. Too often photographers bring out too much color and brightness, creating a very “comic book” like feel (think of The Joker from Batman). The key is to be subtle and focus on the right kind of adjustments. While the changes I made to contrast, saturation, and sharpness were global (meaning they effected every pixel of the image), our goal is to use more “localized” adjustments that only effect a specific portion of the image, in this case the eyes. This is accomplished by using the “Adjustment Brush” tool found in LR as it allows you to paint in effects as you see fit.
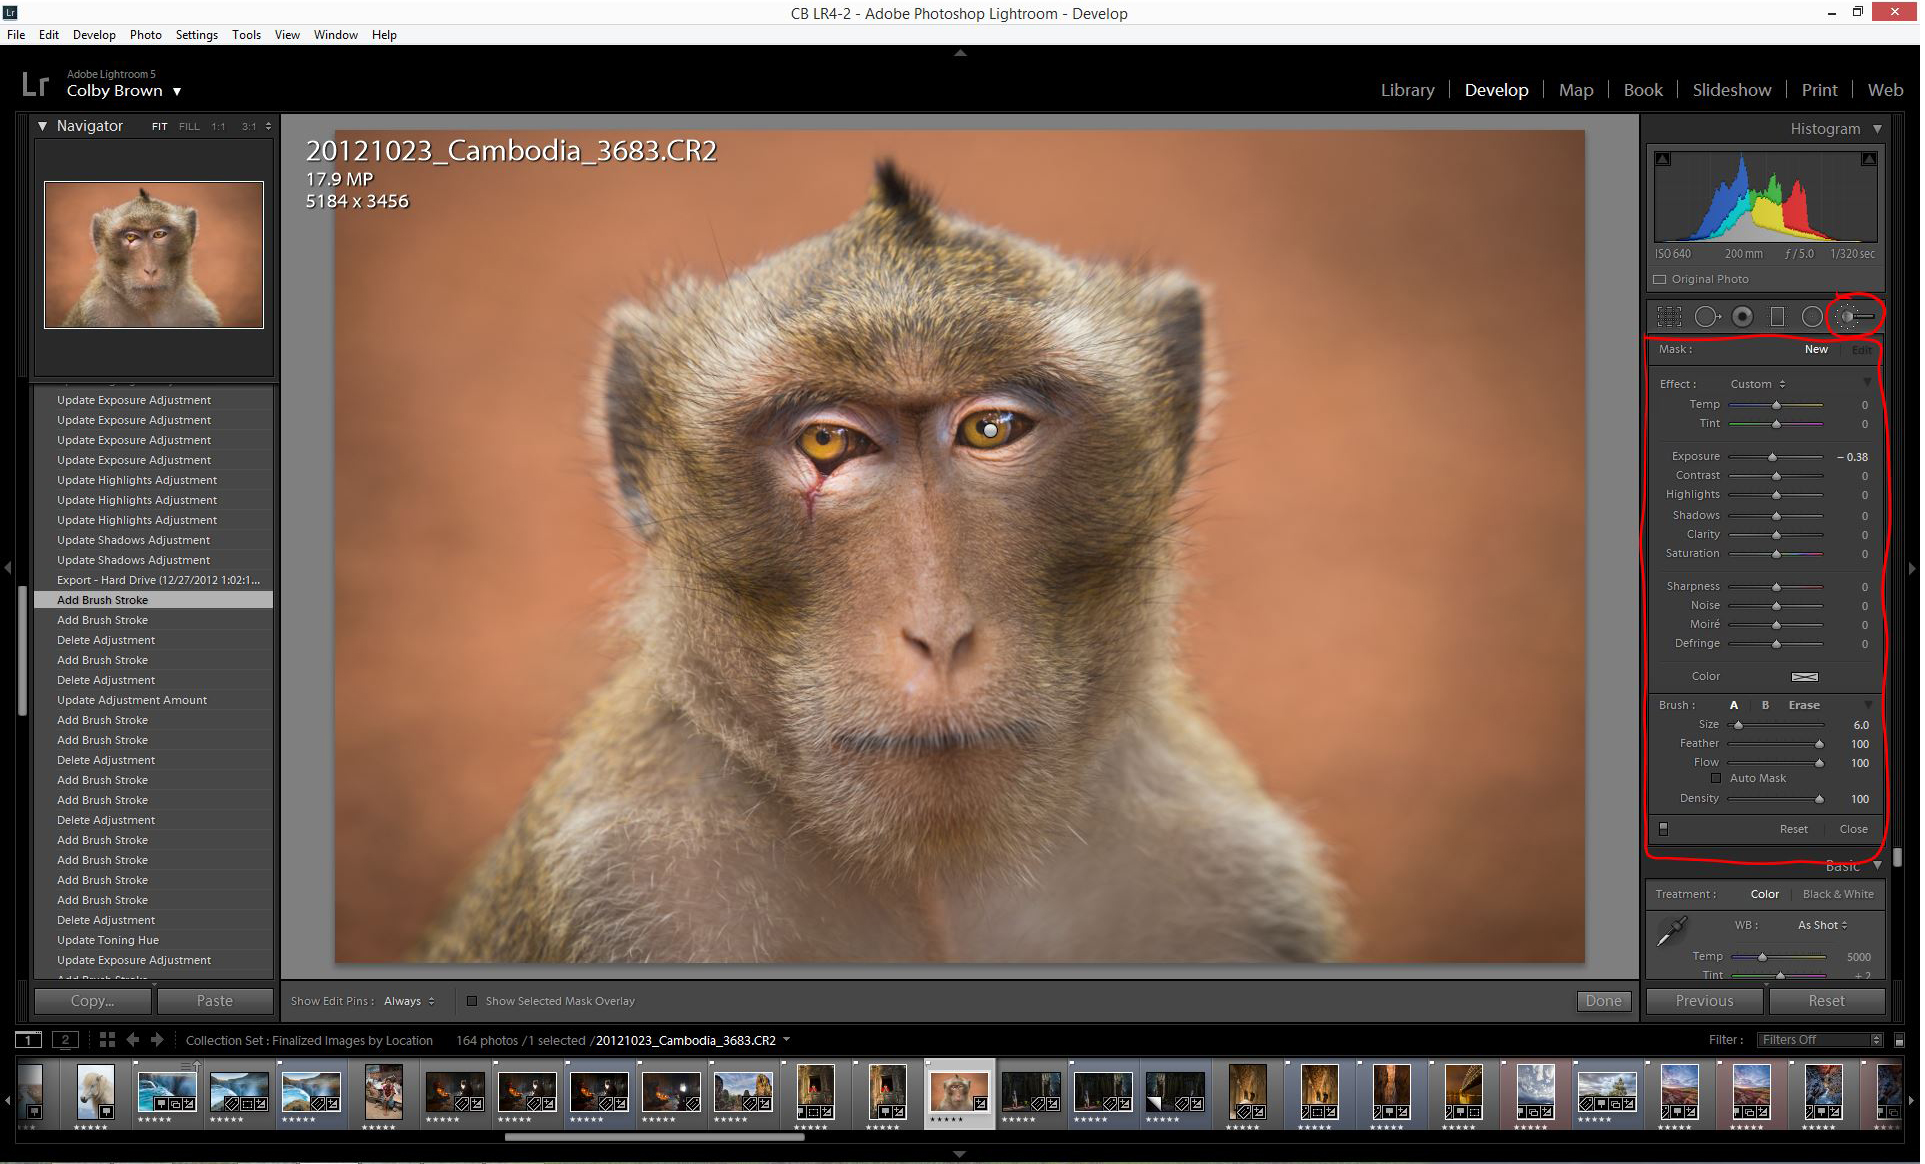
The “Adjustment Brush” feature of LR allows you to paint in effects to certain parts of your image
To start, I applied a solid dosage of brightness around the eyes, which allowed me to see more of the detail that was being hidden by the shadows of my original image (as seen above). As I moved forward, I began to slowly pull back the brightness found around the eyes and began to tinker with the Highlights, Shadow, and Saturation adjustments with the brush. This allows me to better fine tune the brightness of the eyes while beginning to play with finding the right saturation point.
By pulling back the brightness around the eyes, I was able to focus on saturation and color.
After settling on a brightness I was happy with around the eyes, I added a few more adjustment brush applications that allowed me to account for the fact that one eye was darker than the other. This forced me to separately apply shadow and highlight adjustments while carefully dialling saturation up and back down to counter for the shifts in color.
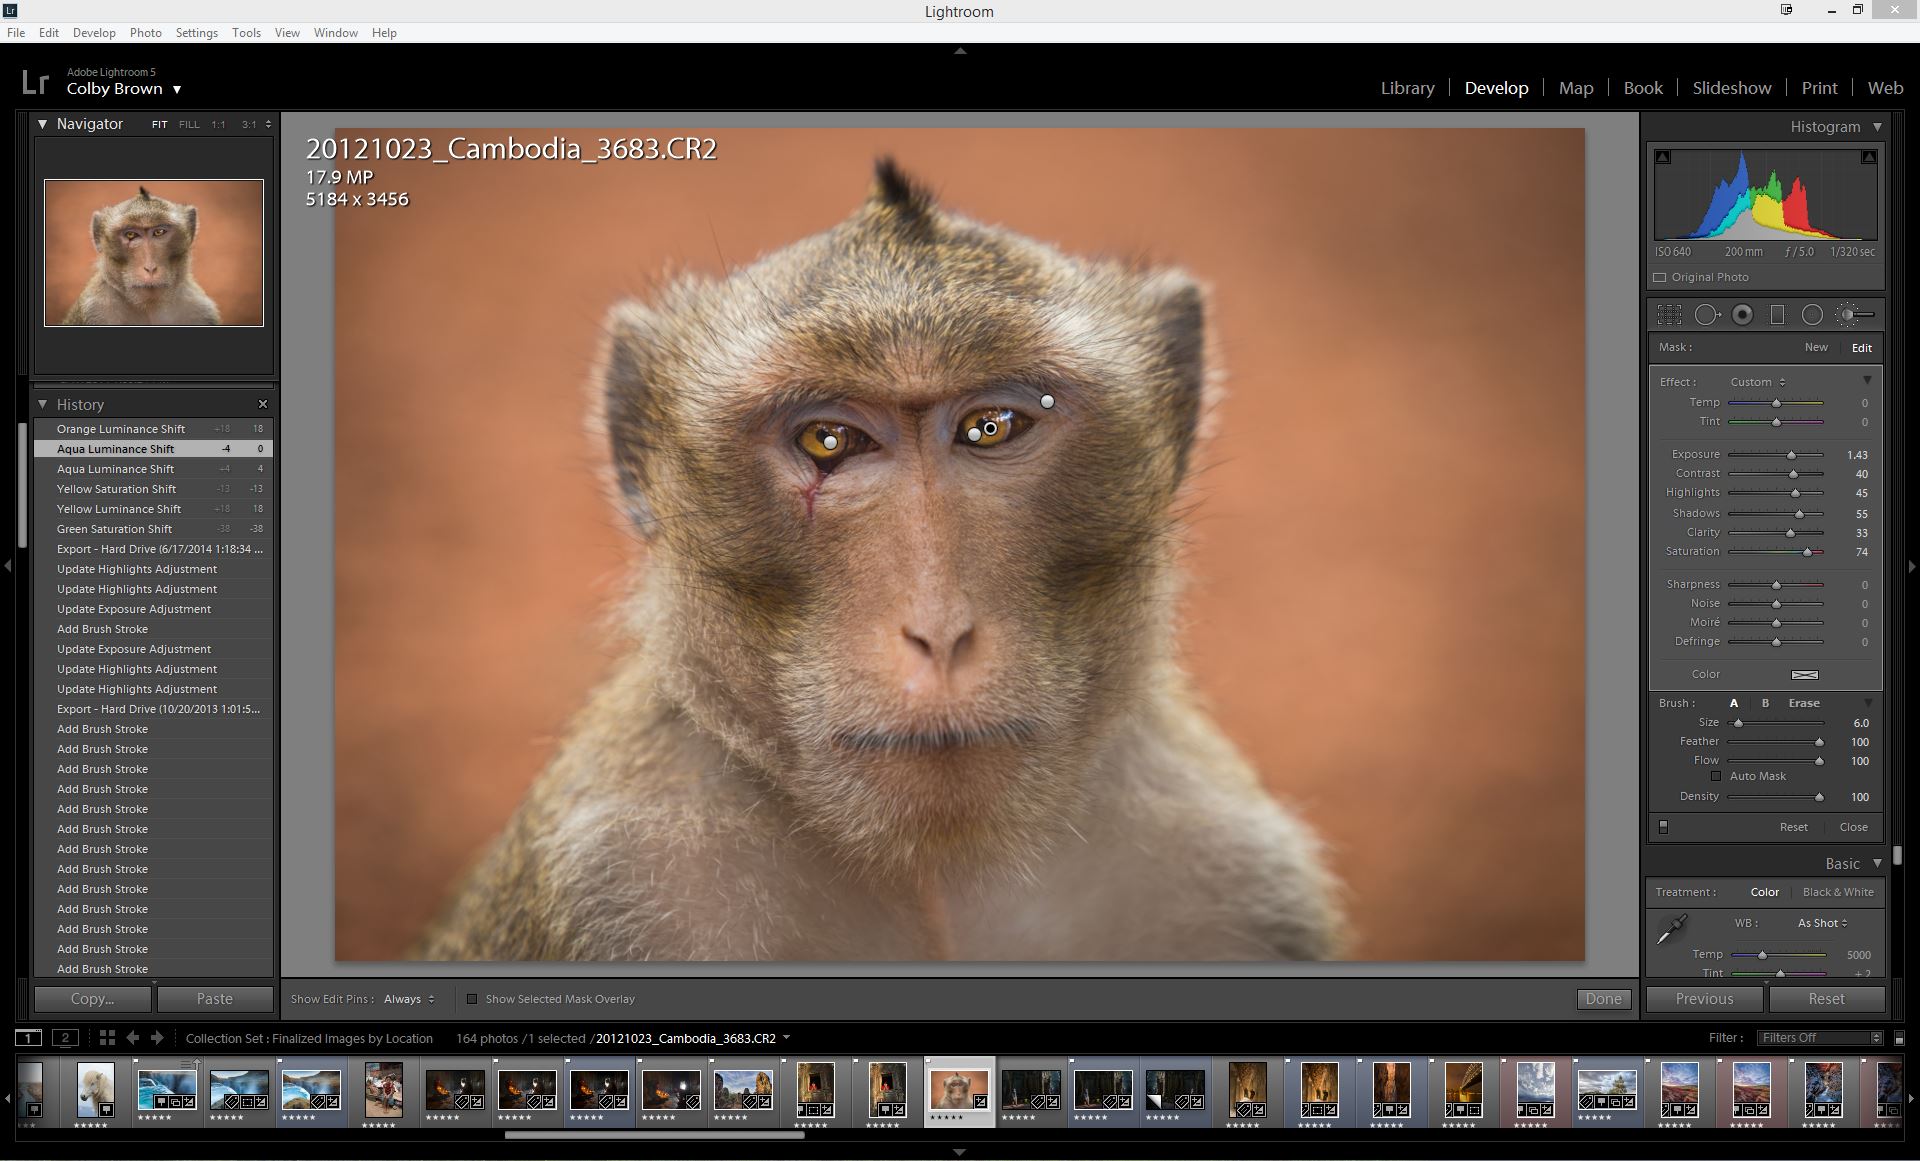
Multiple Adjustment Brush applications allowed me to fix the fact that one eye was darker than the other
Once I was happy with the results, I pulled back the saturation and brightness just a touch more to make sure that I wasn’t over-editing the eyes. It is easy to get wrapped up in editing an image and take an edit too far.
The final result is an image that is not only more compelling, but that more accurately reflects the amazing creatures that I was fortunate enough to photograph on a path through the Cambodian Jungle.